 |
| Handmade Notepad Tutorial |
by Ana Ribeiro aka Arte e Luar
Today I bring you an easy and fun way to make a notepad that you can then give as a little gift this Christmas.
It's not a new tutorial, I have done it for my own blog Arte e Luar, but I've taken new pictures and made new designs for the page options of the notepad.
In the end of the tutorial you will have a PDF file that you can download with the instructions and notepad page designs.
I just ask that you only use them for personal use.
Enjoy!
 |
| All that you need for making a notepad |
What you will need:
- Paper sheets;
- Card or cardboard for the back;
- Decorative paper for the cover;
- White glue;
- X-acto knife;
- Ruler;
- 2 binder clips;
- Paper to protect the table
- Cutting Mat.
Instructions:
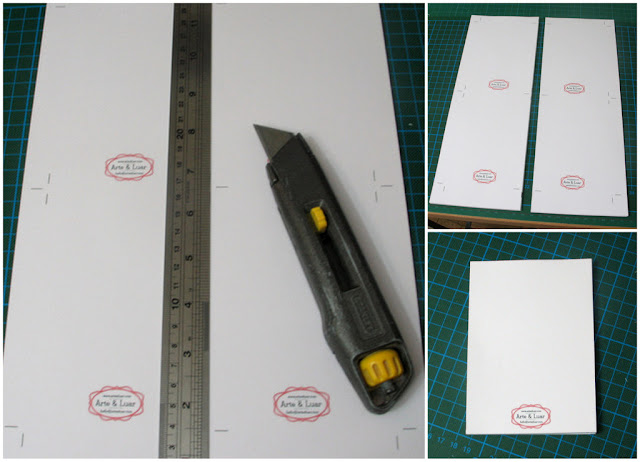
1. The first step is to choose which design you want and print it 12 times, alternatively you can use any paper you want plain or patterned;
2. Cut following the marked lines using a ruler and an x-acto knife. It is best to use a metal ruler to avoid the risk of ruining your ruler;
 |
| trimming the pages for your handmade notepad |
3. Cut the paper for the cover with 2 cm more in height and width equal to the width of the sheets of the block;
 |
| the pages and the cover of the notepad- size difference |
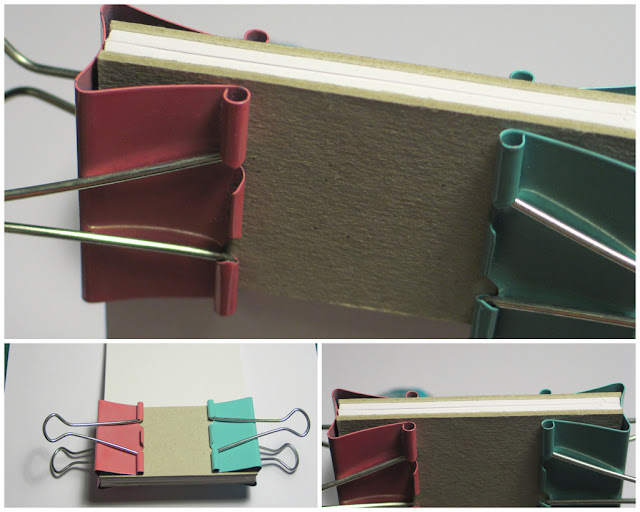
4. Protecting the block sheets with pieces of cardboard or several layers of paper hold the sheets together with the binder clips, one on each side, taking care to keep sheets lined;
 |
| holding the sheets together for gluing with binder clips |
5. Apply a layer of white glue on top of the block and let it dry, the binder clips help keep the sheets together and without touching the table. Once dry, apply the second layer and let it dry;
 |
| gluing the sheets |
6. Cut the card for the back of the block and apply a thin layer of glue on top of the card and glue it to the block;
 |
| Applying glue to attach the block to the back cover |
7. Fold the paper cover in order to go around the block and apply glue to stick the extra paper on the back of the block;
 |
| Gluing the cover to the back cover |
8. Protecting the block again with strips of card or paper apply the springs in order to maintain the block closed as it dries;
9. Et voila! A nice notepad to offer!
 |
| the finished notepad |
Instructions and design options in PDF.
You can find Ana's Books at her Etsy shop.
You can also find her at her facebook page or at her blog.
Text, PDF and photos by Ana Ribeiro.


.jpg)


.jpg)


that's so great Ana!!
ReplyDeletethank you for sharing this knowledge!!!!
You're welcome. :)
DeleteExcelent Ana!
ReplyDeleteYou're awesome!
Thank you Andreia!
DeleteYou're awesome too! :)