 |
| Embroidered book cover made of raxa |
Making a book cover is very simple... And making it with burel is even more simple because there is no need for finishing edges once they won't unravel. No sewing needed!!
Burel is a Portuguese fabric made of woven felted wool. It's similar to felt, but more rustic. Burel is woven and felted unlike wool felt that is felted but not woven. It is very compact, resistant and waterproof. Here you’ll find more information on the manufacturer process, follow the link it’s worth it!
It was used by mountain people and shepherds in capuchas, wool hoods that protected them from the cold. Recently I began working with burel to create “capuchas” for books and mugs. In other words, book covers and mug cosies kits.
Start by defining the size of the cover. From my “reviews” I found that the best dimensions are 34cm (13 1/3”) wide if you measure the cover when open and 24cm (9 1/2”) height. I tried many books and almost all fit this size.
What will you need to make the bookcover:
- a piece of burel of 50cm (20”) wide by 24cm (9 1/2”) height;
- one more piece of burel of 11cm (4 1/3”) squared;
- a needle;
- wool yarn;
- a pair of scissors with sharp points.
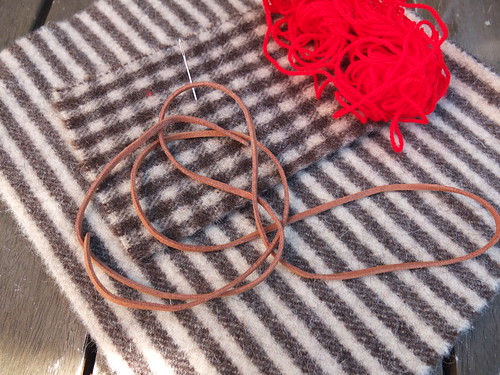 |
| Burel, wool yarn and suede cord. And do not forget the needle… |
- another burel piece of 11cm by 8cm (3 1/7”) (if you are working with inches, you may try to find a similar size easier to measure…)
- 50 cm (20”) of suede cord (or another type, as you prefer);
Alternatively you can make a bookmarker with cork beads…
Let’s begin to work…
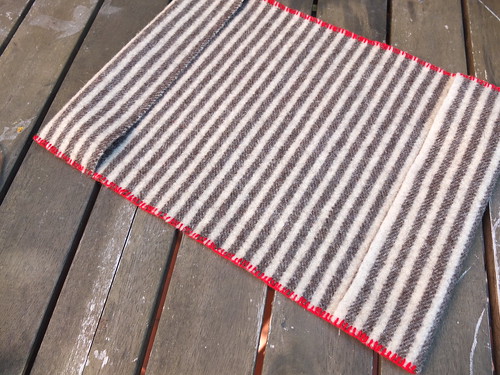
1. Fold over the two outer edges of burel to the required size and baste (two or three stitches will be enough) the four corners of the book cover, making two side pockets. It will be easier to embroider next.
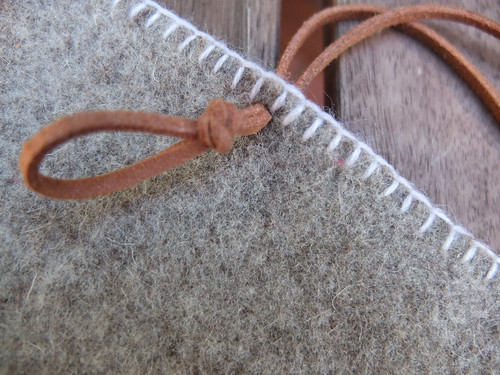
2. Use blanket stitch or running stitch to hold the outer edges and to finish the whole cover. Whipped running stitch looks great, too.
* follow the links and scroll down the pages, you’ll find illustrating videos.
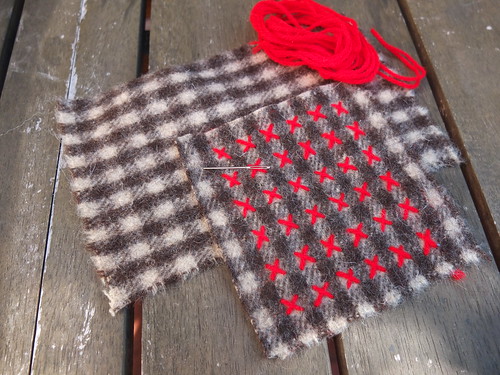
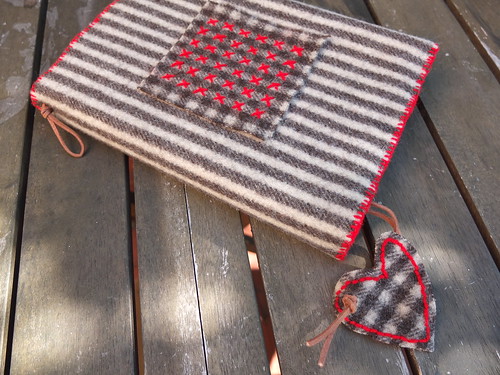
3. Use the square piece of burel to embroider a motif that will decorate your book cover. In this photo I used “raxa”, a kind of burel with striped or square textures. Instead of using a pattern I decided to decorate the squares with simple crosses.
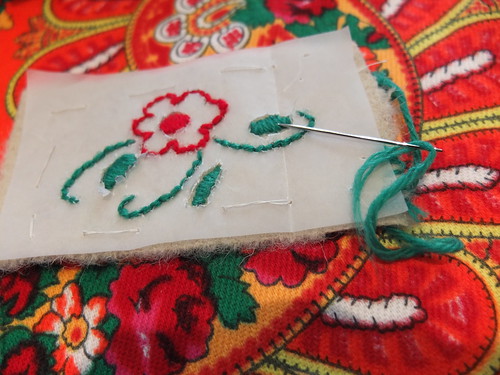
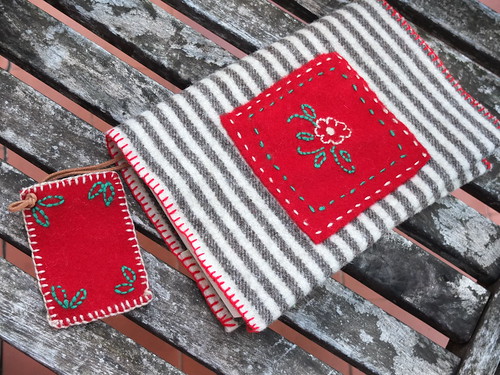
4. If you prefer to have an embroidered motif, you’ll need a pattern. And with this kind of fabrics transferring the motif is never the easiest part… I use tracing paper printed with the pattern and I hold paper and fabric together embroidering through both. Believe me it works better than you would think! At least, if you keep your patterns simple. And you should be careful to remove the paper, it's better to use tweezers...
5. After embroidering the motif you must center it in the front of the cover and use an appropriate stitch, like blanket stitch, running stitch or back stitch, to attach it to the cover. The top can be left open and you’ll have a pocket in your cover.
7. Make a mould with the tracing paper with the desired shape, place it on top of burel and cut. Then you have to choose a stitch and/or motif to decorate your bookmarker. Embroider it as you did with the book cover motif.
8. Attach the suede cord to the cover, folding the cover in half and choosing a point at the top to make a small hole with a scissors of sharp edges. Thread both ends of the cord through the hole and pull with the needle if needed. Tie a knot so that the marker is secured to the cover as in the photo.
9. In order to finish your book cover you have to attach the embroidered bookmark to the suede cord. Perforate the bookmarker with a sharp-pointed scissors. Then pass the two ends of the suede through the hole and, if necessary, pull them with the tip of the needle. Tie a knot with the two ends together to hold the cord to the burel.
Your book cover is finished! This is a very simple way of doing it but the possibilities are almost infinite... They will depend on the fabrics, the threads, the colours... And, above all, it will depend on your imagination...
And in the end you’ll have a gift for Valentine’s or Mother’s day… Or a unique and well-deserved gift for yourself…
I still have a piece of advise for you: embroidering on burel soon becomes an addiction…
In the Craft Supplies Section of my ETSY SHOP you’ll find the supplies you need to make this book cover. Instead you can buy a kit with all the supplies and step-by-step instructions. Here, in the blog feeling stitchy, you’ll find a similar tutorial using cork fabric instead of burel.
At my site you’ll get to know my work better and you can follow the news at my facebook page.



.jpg)


.jpg)


nice!! :)
ReplyDelete